Cost of materials: $150-$200
Duration: Prep time: 2 hours moulding & casting • 24 hours setting • 1 hour de-moulding & cleanup • 1 hour casting in frame • 24 hours setting —Total time approx. 29 hours.
-
Old sheet or tarp
-
5 gallon bucket
-
3 lbs of Alginate
-
20 lbs Casting Plaster or Hydrocal
-
Water
-
4” wide plastered gauze cut into strips
-
Scissors
-
Measuring beaker
-
Vaseline
-
Gloves
-
Towels
-
Sandpaper or dremel tool
-
Tweezers / bobby pins / soft brush (optional)
-
2” wide artist’s tape
-
24” large bass drum loop
Instructions
*Prep all materials and read steps twice before beginning, as the process will happen all in one go.
1. The place where your model will be sitting while the alginate sets is a very important consideration —they will have to hold that position for at least 5 minutes while gooey alginate drips off of them. We’ve found that doing this outside in the summer works well because it will be a messy process and sitting in fresh air is always nice. However, the sun and air dries out alginate much faster so you will either have to move more quickly, or opt to do this all indoors in a comfy position, semi-reclined.
2. Once you’ve chosen the location, drape an old sheet or tarp over the area and have the model sit semi-reclined. Then rub vaseline over every area that you’d like to capture. We chose to include not just the belly, but an arm and nipples which makes for a more interesting composition.
3. Mix alginate 1:3 ratio of water (this can be mixed with a drill whisk). You have 5 minutes curing time to work with.
4. When the alginate turns pale pink, start covering your model with it working from top to bottom. Be fast, scoop with your hands and just pat it on thick and don’t worry about the drips. Keep adding alginate until it turns white and sets. You’ll have 5-10 minutes.
5. Dip plaster bandages into water and working from top to bottom, cover the entire alginate area with the bandages. Add thicker strips around the edges for strength, and cut smaller strips to cover detailed areas such as around the nipples and hands.. Let it set for 15 minutes or until it is dry (you should be able to tap it and hear a hollow sound).
6. To take the mould off, have the model take a deep breath and wiggle. It should come off smoothly.
7. Place the mould immediately onto a large cushion that has been covered with a plastic sheet (we used our dog’s bed).
8. Cut away the excess alginate from the mould and use bobby pins if needed to grip it to the edges.
9. Vaseline the edges of the plaster bandages and alginate so the plaster cast wont stick to it.
10. Mix a large portion of plaster (enough to fill the mould and more) following the product instructions, and start filling the nooks and crannies. Then start to fill up the sides and center of the mould.
11. Allow 24 hours to set. Flip the cast onto its back and start to remove the plaster bandages by hand or with the help of scissors.
12. Next, carefully remove the alginate. Be very careful around the detailed areas, remove the alginate in small pieces here or with tweezers.
13. While the plaster is still damp (it will feel cold to the touch), make a thin plaster slip and smooth with hands or with a soft brush over any air bubbles and cracks. Using a carving knife cut away excess plaster or weak edges.
14. Give cast time to fully dry, it will be need to be somewhere warm where the water can evaporate. When fully dry, the cast will be lighter in weight.
15. Place a large plastic sheet over a flat surface. Then place your wood ring frame over it. Use the artist’s tape to seal the outer edge of the wood ring to the plastic. This is to keep the poured plaster from seeping too much out of the frame before it sets. It is ok for some to escape, but the goal is to slow it down.
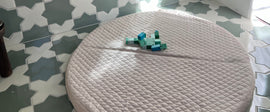
16. Position your cast right side up in the center of your wooden ring. Make sure that when you pour the plaster around your cast, the parts you want to show will not be covered by the plaster. We propped ours up about 1/2” using small pieces (legos work) so that the shoulder did not disappear into the frame.
17. Mix the plaster following the product instructions, and pour quickly filling up the void between the cast and frame. The fast you do it, the less ripples you will have in the final look. You can also refine this with a dremel tool and sandpaper. We left ours natural, with air bubbles and all.
18. When fully dry, use L brackets, screws, anchors and bolts to attached the frame to your wall.